Thai Red Coconut Curry with Chicken

This delicious Thai dish is full of fresh, bright flavors and is the perfect balance between spicy, sweet and savory.  It also comes together in about 30 minutes, making it the perfect dish for a busy weeknight or some time when you don’t want takeout but aren’t wanting to spend a ton of time in the kitchen either.  Enjoy!

Ingredients

  1. 2-3 lbs chicken breasts, thinly sliced
  2. 2 TBSP red curry paste
  3. 1 small onion, diced
  4. 1 small shallot, diced
  5. 1 red bell pepper, sliced
  6. 1 orange bell pepper, sliced
  7. 1 zucchini, halved lengthwise and thinly sliced
  8. 4-5 cloves garlic, minced
  9. Zest of 2 limes
  10. 1 TBSP fresh ginger, grated (or 2 tsp dried powdered)
  11. 1 TBSP anchovy paste or 2 TBSP Thai Fish Sauce (because umami!)
  12. 2 TBSP sweet Thai chili sauce
  13. 2 TBSP soy sauce
  14. 1 cup cheap saké (or chicken stock, if you don’t want to use alcohol), for deglazing
  15. 2 cans full-fat coconut milk
  16. juice of 2-3 limes
  17. 1 TBSP brown sugar
  18. 1 cup fresh basil, leaves roughly torn
  19. Garnish:  Freshly squeezed limes and cilantro (optional)
  20. White rice, for serving

Mise-En-Place

  1. In a medium bowl, mix curry paste and cubed chicken and set aside
  2. Prepare ingredients 3-7, combine, and set aside in a medium bowl (this is your base)
  3. Prepare ingredients 8-10, combine, and set aside in a small bowl (these are your aromatics)
  4. Prepare ingredients 11-13, combine, and set aside in a small bowl (this is your umami bomb)
  5. Measure out saké or chicken stock
  6. Open cans of coconut milk
  7. Measure out brown sugar and lime juice and mix together in a small bowl
  8. Prepare basil and set aside

Cook

  1. Add about 2-3TBSP coconut or olive oil to a large saucepan and heat over medium-high heat until shimmering but not smoking.  Add chicken with curry paste and sauté until chicken is ever so slightly browned (it doesn’t need to be cooked through) and fragrant.  Remove with a slotted spoon and reserve (it’s fine to put it back in the same bowl, you’re going to finish cooking it in the sauce later anyway).
  2. Lower heat to medium.  Add your base (ingredients 3-7) and sauté until onions are translucent and peppers have become quite soft, 3-5 minutes.
  3. Add your aromatics (ingredients 8-10), and continue to sauté until very fragrant, 1-2 minutes
  4. Add saké or chicken stock (flambé if you like), and bring to a boil, scraping up anything stuck to the bottom of the pan.  Once boiling, reduce to a simmer.
  5. Add umami bomb (ingredients 11-13) and stir well to incorporate
  6. Stir in coconut milk and brown sugar/lime-juice-mixture, and continue to stir until sauce is well incorporated.  Bring sauce to a boil and allow to reduce by approximately 1/3
  7. Add chicken (and any juices) back to the sauce and stir in.  Allow to simmer, 8-10 minutes, until chicken is cooked through.
  8. In the last 2 minutes of cooking, stir in the fresh basil and cook for 1 minute.  Off the heat, cover, and allow to sit for 5 minutes to give flavors a chance to marry.
  9. Serve over white rice and garnish with a few squeezes of fresh lime juice and fresh cilantro.

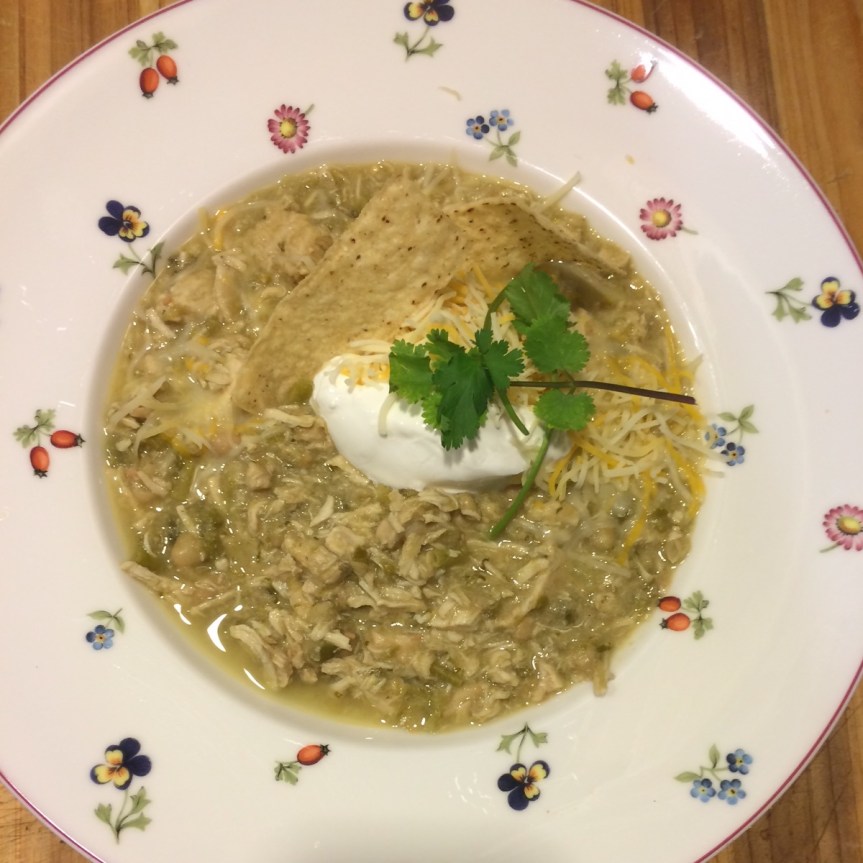
Chicken Chili II (Updated Version)

Recipes change over time.  As we spend more time in the kitchen and become better cooks, we learn new things; as we learn new things, we incorporate them into the dishes we already know how to make.  That’s ultimately how a dish becomes “ours” – when we’ve come to know it so well through years of making it that is truly our own.  In my mind, though, even when a dish has become “ours” it has never reached perfection – and even after nearly 20 years, I’m still learning new things.
This has the same ingredient list (with the addition of 3 TBSP of flour, a couple of other spices, and some celery) as my original recipe, but the ingredients are treated differently and cooked differently to maximize depth of flavor.  The primary difference is that this method involves browning the chicken breasts first along with a spice mixture whereas in the original the chicken is not browned and the spices are dumped in just prior to adding the broth and reducing liquid.
This is how I’m making my chili these days:

The Prep time in this dish is a bit long since there’s a lot of chopping involved; use a sharp knife to make things a bit easier.  As always, give yourself a good head start on the prep.  If you have, say, 15 extra minutes, roast your chiles (only the Hatch/Anaheim ones) ahead of time.  It will bring out their sweet smokey spicy flavor.

Time: 60 – 90 Minutes
Level: Easy
Cost: $6-8/plate
Serves: 4-6

Ingredients:

  • 3 lbs boneless, skinless chicken breasts (about 6 breasts)
  • 3 TBSP flour
  • 3 TBSP cumin powder (you read that right, it’s not a typo, I mean Tablespoons)
  • 1 TBSP paprika
  • 2 tsp cayenne pepper
  • Salt and pepper
  • 2 TBSP vegetable or canola oil
  • 2 TBSP olive oil
  • 1 large Spanish or yellow onion
  • 4 jalepeño peppers, stems and seeds removed, minced
  • 1 large green bell pepper, diced
  • 1 cup celery, diced (about 3 stalks)
  • 5-6 cloves garlic, peeled and minced
  • 4 TBSP (about half a bunch, not including stems) fresh cilantro, finely chopped
  • 4 Hatch Chile Peppers (Anaheim Chile Peppers will also work), roasted and peeled (optional), diced.  Note:  Alternatively, pre-diced, canned green chilies work fine as well – you’ll need 3, 3.5oz cans 
  • 1-2 tsp hot sauce (or to taste, optional – I use Dave’s Insanity Sauce because I like it spicy!)
  • 1  can/box (32oz) of low-sodium chicken broth
  • 2 cans (14oz each) white beans (NOT cannellini!), drained.
  • Optional: For serving – tortilla strips, corn bread, sour cream, shredded Mexican Cheese

Optional Preparation Step (not required but it makes a big difference): 
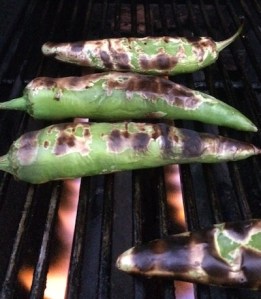
chilesRoast your Hatch/Anaheim chiles over high heat on the grill, or under a broiler set on high – I do mine on the grill over Mesquite wood.  Wait for the skins to blister and are mostly blackened (yes, don’t be afraid to burn them, that skin is coming off anyhow), then flip and repeat on the opposite sides.  Once thoroughly roasted, place them in an airtight container (Tupperware, or simply a large bowl with a plate on top)- this will steam them in their own heat.  After about 20 minutes, remove the chiles from the container and transfer to a cutting board.  Peel the skins off and remove seeds and stems; if you blackened your chiles well, the skins should come off quite easily; if not, you can try peeling them under cold running water.  Consider using rubber gloves for the peeling process if you’re using Hatch Chiles- hot pepper hands are the worst!


Main Preparation Instructions

  1. Dice onion, jalepeños, green bell pepper and celery; combine in a medium bowl and set aside.
  2. Mince garlic and chop cilantro – combine and reserve in a small size bowl and set aside.
  3. Dice Hatch (or Anaheim) chiles and reserve in a separate bowl (or open cans thereof).
  4. Open two cans of white beans, drain.
  5. Get chicken broth ready.
  6. In a large tossing or mixing bowl, add chicken breasts (whole).  Drizzle with olive oil and toss to coat.  Add flour, cumin, paprika, cayenne, a pinch of kosher salt and a few generous grinds of fresh black pepper.  Toss to coat again.

Cooking Instructions

In a large stock-pot (or very large skillet or saucepan), add vegetable and olive oil and heat over medium heat.  When oil is hot and shimmering, but not quite smoking,  Carefully add 2 -3 of the coated chicken breasts and brown, 3-4 minutes on each side, without overcrowding the pan – you will probably need to work in batches.  Once all the chicken breasts are nicely browned, remove them from the pan and transfer to a carving board (note I did not say cutting board).  The chicken does not need to be cooked through at this point.  You will now have a beautiful, spicy fond on the bottom of your pan.

Lower the heat and add onion, celery, green bell pepper and jalapeño peppers to the pot (make sure the pan isn’t too hot when you do this).  Sauté over medium heat, stirring to prevent burning.

Note:  If you don’t have a lot of experience gauging how hot the pan is, you can test it by dropping ONE tiny piece of the diced onion into the pan.  If it sizzles loudly, crackles, or jumps out of the pot spattering hot oil everywhere, it’s too hot.  The onion should only react slightly.  If it turns out it’s too hot, remove the pan from the heat for a minute or two until it cools down a bit.

As the vegetables sweat out their moisture, scrape up the fond in the bottom of the pan and incorporate into the mixture.

Once vegetables have sweat out most of their moisture and most of the fond is incorporated, carefully add the cilantro and garlic to the mixture.  Continue to sauté until very fragrant, 2-3 minutes.


Add Hatch/Anaheim Chiles and hot sauce, if using.  Stir well to combine and lower the heat to low, stirring occasionally to allow flavors to marry, 5-7 minutes.

Meanwhile, while flavors are marrying, dice chicken breasts into cubes on cutting board (this may be a bit messy due to liquid having been released, so use a cutting board to catch the juices).

Add chicken to pot, along with any juices accumulated on the cutting board.

Add chicken broth and beans and stir well to combine – there should be enough liquid to cover everything in the pot once it’s been stirred together.  If there isn’t, add a bit of water until everything is covered by at least 1/4 inch of liquid.

Cover, and bring to a rolling boil.

Remove cover, reduce heat to medium-low, and allow to simmer down, 1 hr and 20 minutes, or until desired consistency is achieved.  Stir occasionally to prevent anything from sticking to the bottom of the pan.  If a lot of fat begins to accumulate on the top, you may wish to skim some of it off.  (Now is a good time to crack open a beer).

Just prior to serving, turn the heat off and stir continuously for 10 minutes, or until your arms fall off.  This will make it so that the chili is cool enough to eat; it also will break down the chicken into nice ‘strings’ giving it the consistency of pulled chicken.  It also aids in the final thickening to give it that nice chili texture.

Serve with Tortilla strips, sour cream, cheese and cornbread.

 

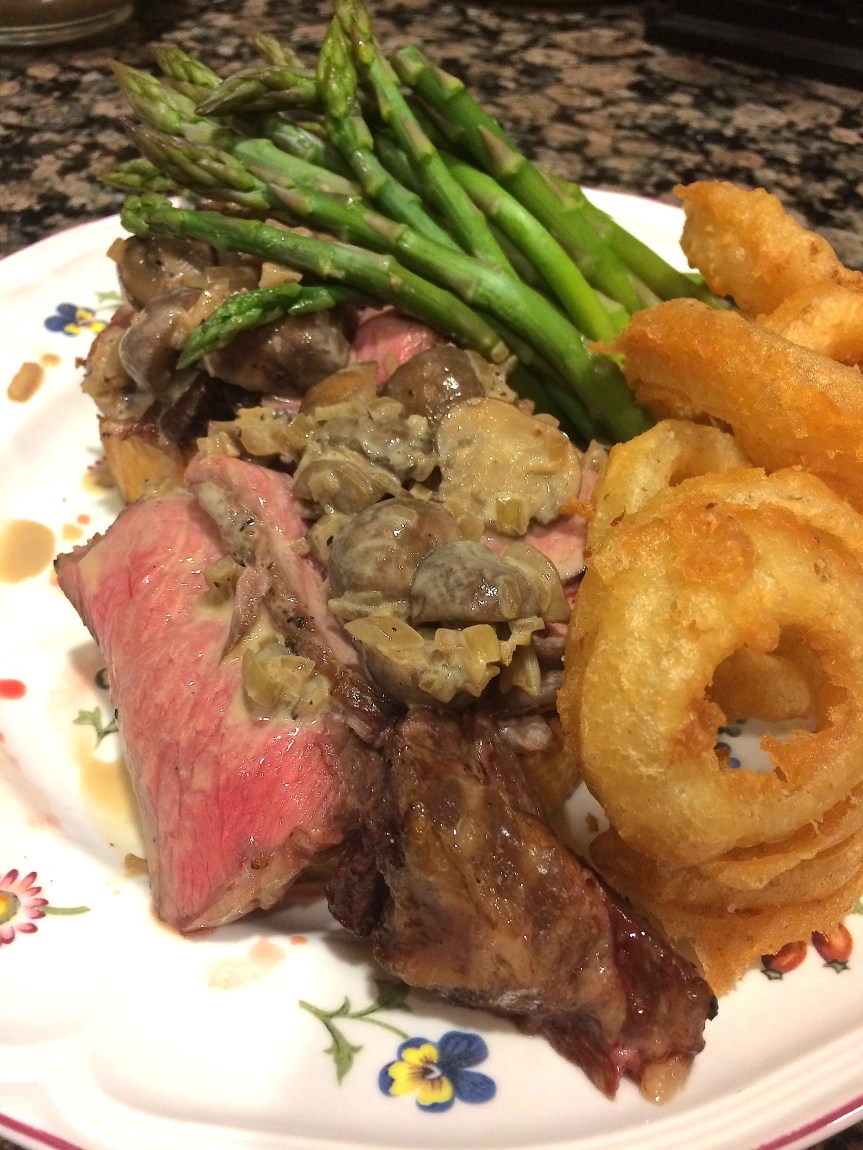
Truffle Infused Steak Tartine, Brandy Mushroom Cream Sauce, Homemade Onion Rings

This is not as hard as it looks.  Seriously: it sounds impressive; it tastes professional; it is guaranteed to wow anyone who eats it (even if that person is just you).  There are quite a few steps here, so read carefully, but you’ll be surprised how easy this is.
Let’s dive in.

Time: 90 minutes – 2 hours
Level: Intermediate
Cost: About $7.50 per plate
Serves: 4

Ingredients

For the Onion Rings

  1. 1.5 cups all purpose flour
  2. 1 12oz can beer
  3. 1/2 TSP baking powder
  4. 1 egg
  5. 2 cups vegetable or canola oil
  6. 2 large onions, cut into rings

For the steaks and mushroom-cream sauce:

  1.  4 boneless New York Strip Loin Steaks
  2. Salt & Pepper
  3. 2-3 TBSP clarified butter (also known as ghee, recommended), canola oil, avocado oil, or bacon fat – hell whatever you want as long as it has a smoke point of over 400°F
  4. 1 medium shallot, diced
  5. 3 cloves garlic, minced
  6. 80z whole mushrooms, quartered
  7. 1 TBSP unsalted butter
  8. 1/3 cup brandy, for flambé
  9. 1 140z can beef broth
  10. 1/4 cup heavy whipping cream

For the Toast:

  1. 1/4 cup good olive oil
  2. 1 TSP Truffle Oil (optional, but worth it if you have it.  Truffle oil is available from Amazon, Sprouts and Whole Foods for not too much and since a little bit goes a LONG way it’ll last you)
  3. 8 thick (1/4 – 1/2 inch thick) slices sourdough bread

Instructions

Preheat an oven to 275°F.

Place steaks on a wire rack over a lined baking sheet.  Rub steaks on both sides with a drizzle of olive oil.  Season both sides aggressively with kosher salt and freshly ground black pepper.  Tent loosely with foil to prevent excessive browning and place them in the oven.  Bake in oven until internal temperature is about 115°F.  This will take about 20-30 minutes, but remember:  Cook with temperature not time.  Use an instant read thermometer to verify temperature.

While steaks are coming up to temp in the oven, do three things:

  1. Prep Onion Rings:  Mix ingredients 1-4 in a medium bowl and whisk thoroughly to create a batter.  Slice onions into rings and add to batter.  Stir to incorporate.  Cover and set aside to let rest at room temperature.
  2. Prep Ingredients for Brandy Cream Sauce:  Dice shallots, mince garlic, and quarter mushrooms.  Get brandy, beef broth and cream ready to go.
  3. Prep Toast:  Slice sourdough bread into thick slices.  Add 1 TSP truffle oil to 1/4 cup olive oil and stir gently to combine, set aside and allow flavors to meld.

Once the steaks have reached an internal temperature of 115°F, remove them from the oven and pat dry with paper towels and allow to rest.

Increase oven temperature to 500°F for toast.

While steaks are resting and oven is coming up to temp, heat fat (ghee, clarified butter, avocado oil etc) over medium-high heat in a large sauté pan until almost smoking (about 400°F).  Once fat is up to temperature, carefully place steaks in the pan and sear until dark golden brown, about 3 minutes per side.  You should develop a beautiful fond on the bottom of the pan.  Don’t overcrowd the pan – two steaks at a time is probably good.  Once steaks are seared, remove them and set them back on the wire rack to rest, covered loosely with aluminum foil.  Reduce heat to medium-low.

Carefully add shallots and sauté until mostly translucent, 3-4 minutes.

Note:  Don’t burn the shallots.  If you’re not sure if the pan is too hot, test for temp by tossing 1 little shallot piece into the fat.  If it sizzles and crackles loudly or burns, turn down the heat. 

As the shallots sweat out their moisture, scrape up any fond left behind by the steaks to incorporate.  Once shallots are translucent, add garlic and sauté until fragrant, 1 -2 minutes longer.

Add mushrooms and continue to sauté until mushrooms have absorbed most of the liquid in the pan and the bottom of the pan begins to look a bit dry, 1-2 minutes.  Add 1 TBSP butter to mixture and continue to cook, continually scraping and stirring so as not to burn your fond, until the butter is absorbed into the mushrooms.

Note:  Mushrooms are flavor sponges.  Give them time to absorb the deliciousness in the pan.

Once the mushrooms have absorbed most of the liquid and butter in the pan, and the bottom of the pan is starting to look a bit dry once more, crank the heat up to high for about 20 seconds.  Lower the heat, add the brandy, and flambé.  Once the flames have subsided, add the beef stock and bring to a boil, scraping up whatever brown bits might be left at the bottom of the pan to fully incorporate fond.  Add the heavy cream, reduce heat to medium-low, and allow to simmer until sauce has thickened to a gravy-like consistency.  Stir or shake occasionally to prevent burning.

For the Onion Rings

While sauce is reducing, heat olive oil for onion rings in a large saucepan until it reaches a temperature of about 375°F.

Note:  If cream sauce ends up finishing while onion rings are still being made, don’t worry.  Just off the heat and cover, then continue as follows; it will keep warm long enough for you to finish the other steps. 

Once oil is up to temp, use tongs to remove onion rings from batter one at a time, shaking off the excess.  Fry in oil a few at a time, until golden brown, 3-5 minutes per batch.  Using a slotted spoon, remove and allow to drain on paper towels.

For the Toast:

Brush sourdough slices lightly on both sides with oil mixture.  Place on an ungreased baking sheet and bake in 500°F oven for five minutes or until beautifully golden brown.

Final Assembly:

While toast is browning in oven do two things:

  1. Strain the mushroom cream sauce into a bowl through a fine mesh strainer to separate the mushrooms from the liquid.  Reserve mushrooms.
  2. Slice steaks into thin-ish strips on the bias.

When toast is finished, remove from the oven and plate – two slices per plate to make four plates.

Place 4-6 strips of steak on top of each piece of toast, followed by reserved mushrooms, followed by a generous drizzle of brandy cream sauce (Don’t be shy!).  Fan additional slices of steak around toast to look cool, if you like, totaling about 1 steak per person.

Serve with onion rings, steamed asparagus (or any other green vegetable) and a robust red wine.


Hearty Beef Stew with Red Wine

Perfect for a cold winter’s night, this hearty stew takes about 30 minutes to prep and then cooks all day (or part of the day, depending on your method).  The addition of red wine makes it quite similar to beef bourginon, but this version also includes potatoes.  It can be made in the slow cooker or in the oven.

Time: 30 minutes (active prep), 4-8 hours (in the slow cooker), 4 hours in the oven.
Level: Easy
Cost: About $4 per plate
Serves: 4- 6

Ingredients

  1. 3 lbs chuck roast (to be cubed after browning it; more on that later)
  2. 1-2 TBSP olive oil or clarified butter
  3. 4-60z bacon, sliced into lardons
  4. Salt and Pepper to taste
  5. 2 lbs white potatoes, cubed
  6. 1 yellow onion, diced
  7. 4-5 celery stocks, chopped into 1.5 inch pieces
  8. 2 lbs carrots, peeled and chopped into 1.5 inch pieces
  9. 4-5 garlic cloves, minced
  10. 8 oz Crimini or Baby Bella mushrooms, halved or quartered depending on their size
  11. 1/4 brandy (optional, for flambé)
  12. 1 cup sturdy red wine (such as Cabernet, Shiraz, or Zinfandel)
  13. 1/2 cup concentrated beef stock
  14. 3 TBSP all purpose flour
  15. 2 TBSP Worcestershire sauce
  16. 1 TBSP Soy Sauce
  17. 1-2 tsp cayenne pepper, depending on how much zing you want to add, optional

Instructions

Note:  If going the slow cooker route, every time the instructions say “Remove and reserve” you can just dump whatever it is into the slow cooker.

Preheat oven to 275°F (or if using slow cooker, coat the bottom of the slow cooker with cooking spray).

Begin by heating bacon and 1 TBSP olive oil or clarified butter in a large skillet or dutch oven over medium heat.  Sauté bacon until fairly crispy and most of the fat has rendered.  Remove with a slotted spoon and reserve.

Next, pat the roast dry with paper towels and season aggressively with salt and pepper on all sides.  Sear the roast on all sides until golden brown.  Remove roast and allow to rest on a cutting board while continuing to the next steps.

Add onion, celery and carrots to the pot and sauté until onions are translucent and vegetables begin to soften, 5- 7 minutes, scraping up any brown bits that may begin to loosen as the onions begin to sweat.  Add garlic and sauté until fragrant, 1-2 more minutes.  Remove all items from the pan with a slotted spoon and reserve.

Add mushrooms to the pan and sauté until lightly caramelized and they have absorbed most of the fat/liquid in the pan (mushrooms are like little flavor sponges).  Once the pan is beginning to look a bit dry on the bottom, add 1/4 cup brandy and flambé.

Add bacon, onions, celery, carrots and garlic back into the pan with the mushrooms.  Add soy sauce, Worcestershire sauce and cayenne pepper and stir to combine.

Add red wine and beef stock and bring to a boil, continuing to stir to scrape up anything that might still be on the bottom of the pan.  Stir in flour.  Reduce heat and allow liquid to simmer, reducing by about 1/3 to 1/2.

Meanwhile, while the liquid in the pan is reducing, cube the beef on the cutting board and add it directly back into the pot.  Add potatoes.

If finishing in the oven, give everything a good stir to combine and then cover and place in a 275 degree oven for 3-4 hours.

If finishing in a slow-cooker, dump the whole mess into the slow-cooker, give everything a good stir to combine, and cook on LOW for 8 hours or HIGH for four hours.  Personally, I have found the low, slow 8 hour cook in the slow cooker to yield the best results.


Butterless Slow Cooker Indian Butter Chicken

This dish preps in about 20 minutes, cooks all day, and then awaits you when you get home from work (or whatever you are doing).  The addition of yogurt makes it a bit healthier than the traditional all-butter-and-cream method, and adds a zesty tang to the final product.  Serve this over a bed of white rice and brighten it up with a garnish of fresh cilantro and a few squeezes of lime just before serving.

Time: 20 minutes (active prep), 6-8 hours (in the slow cooker)
Level: Easy
Cost: About $3 per plate
Serves: 4- 6

Ingredients

  1. 3-4 cloves garlic, minced
  2. 1 medium white onion, finely diced
  3. 2 tsp garam marsala
  4. 2 tsp yellow curry powder
  5. 2 tsp cayenne powder (less if you can’t handle a bit of heat)
  6. 1 tsp cumin powder
  7. 1/2 tsp ginger
  8. 1 6oz can tomato paste
  9. 1 cup full fat plain Greek yogurt
  10. 3 TBSP heavy cream (or coconut cream if you want it super healthy and you like the flavor)
  11. Optional:  If you like it a bit more “soupy”, you can add a cup of water or stock to the mixture.
  12. About 3 lbs chicken breast (or boneless thighs), cubed into 1 – 1.5 inch cubes

Instructions

Coat the inside of a slow cooker with cooking spray.

Combine ingredients 1-7 in the slow cooker and stir well to combine.  Add ingredients 8-10 (and 11 if using) and stir well to combine again.  Add chicken and stir well to combine a third time.  Cover, and cook on LOW for 7-8 hours or HIGH for 4 hours.

That was easy, wasn’t it?