
Essential tips and tricks that will make your food taste way better and more interesting and add that “What’s In Here?” flavor to just about everything.
So, here it is – Five things you should be doing in the kitchen if you aren’t already:

#1: You Should Be Making Your Own Stock
You can do this in an afternoon with it 90% hands-off while you’re doing other stuff.
There are a lot of ways to do this, and not all of them involve a two day process of standing by a hot stove, skimming stuff off the top (although that’s ONE way to do it).
Better method: Use an Instant Pot – or any multi-function, programmable multi-cooker. ALDI (the grocery store) actually makes a pretty good one too. For an in-between path, use your slow-cooker.
Basically, here’s the game plan. EVERY time you cook, save all that stuff you throw away, such as:
- The tops and root ends of onions and shallots
- The bottoms, tops, and limp center parts of celery stalks
- Carrot peels, and the root ends of carrots
- Those little, useless, tiny garlic cloves in the middle of the head of garlic
- The stems and unused leaves of various herbs: Parsley, Thyme, Rosemary
Don’t throw this stuff away – toss it all into a bowl while you’re cooking, and get a 2 gallon Ziploc Freezer Bag going that you keep in your freezer. It’ll take a while to fill that sucker up, but that’s the whole idea. When it’s 2/3 full, you’ve probably got enough stuff for a stock base.
Get another freezer bag going to keep bones from chicken wings, wing tips, thigh bones, breast bones, that bone from the steak you made last weekend, that bone from your pork shoulder you smoked or made ragu with, etc. I used to do chicken stock, beef stock, pork stock… but honestly, these days I just make something I call “Essential Bone Stock” call it a day. The only exception is…
Seafood stock – Keep lobster bodies, shrimp shells, crab legs and pieces in another Ziploc.
Make this stuff by the gallon – freeze it in deli containers or 1 quart freezer bags, and store it in the freezer for up to 6 months. It’ll save you money, and everything you make will taste WAY better
Click here to read the whole story
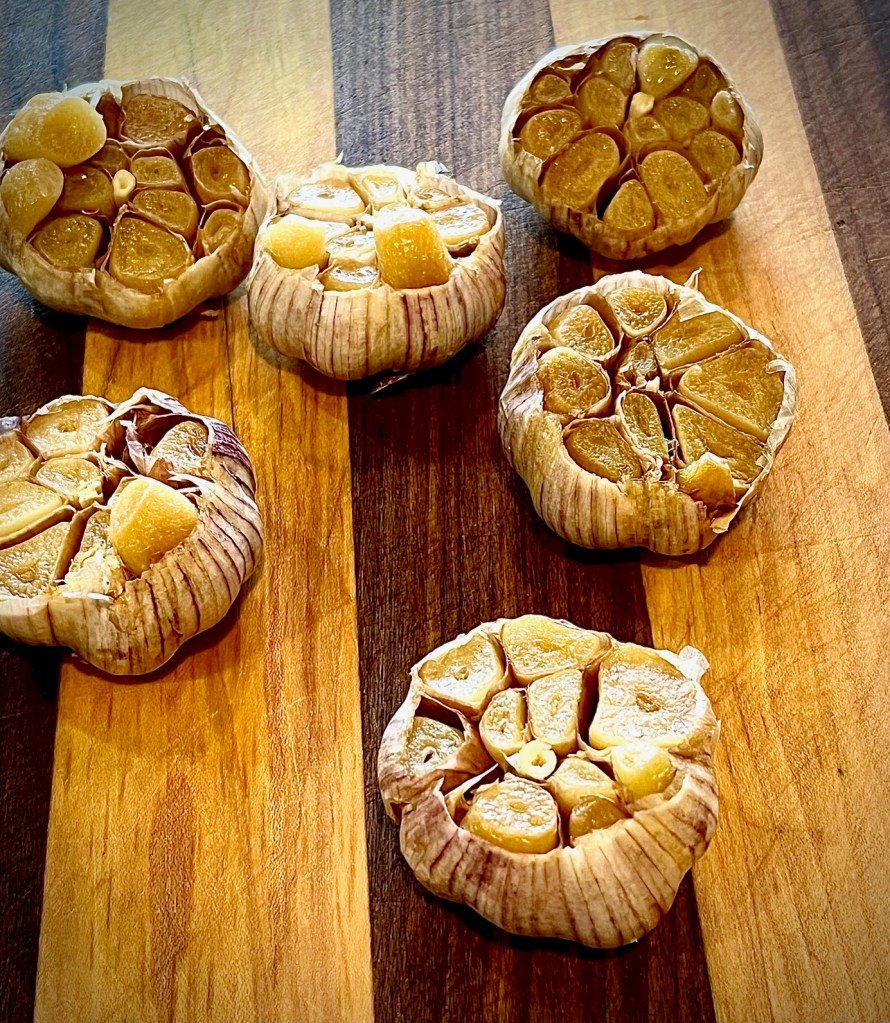
#2: You Should Be Roasting Garlic and Keeping It In The Freezer
Get yourself a big bag of whole garlic bulbs and cut the tops off, exposing the cloves. Keep the top pieces and put them in your stock bag in the freezer (see Tip #1). Place the cloves in a small oven-safe dish, cut side up. Drizzle with olive oil and sprinkle with Kosher salt. Cover tightly with aluminum foil, and place into a COLD oven (cold start here).
Set the oven temperature for 325°F. Once the oven is up to temp, roast garlic for about an hour. Take it out of the oven, and allow to cool to room temperature (still covered). Freeze garlic bulbs and store for up to 6 months.
To use: remove garlic bulb from freezer and microwave on 20% power for 3 minutes – or 4 minutes at 10%, depending on the strength of your microwave. You may have to experiment to figure out the optimal settings for YOUR microwave, but it’s somewhere in this ballpark.
Allow to cool – roasted garlic is like molten plasma.
Squeeze into all kinds of things: mashed potatoes, garlic bread-spread, pasta sauce… or use it as part of an “Umami Bomb” (see next Tip).
Or just eat it: Put it on a small plate, drizzle some Extra Virgin Olive Oil over it, lace the oil on the plate with a little balsamic vinegar, and use it as a bread dip… or spread it on crackers with brie cheese… mmmmmm.

#3: You Should Be Using an Umami Bomb in Sauces, Soups, and Stews
What is an umami bomb? Basically, it’s a paste made of a number of ingredients that are high in glutamates, sodium ions, potassium ions, and inosinates – all of which which basically open up your taste buds and therefore help you perceive and receive flavors more intensely – salt being the most common example.
A typical Umami Bomb for me generally includes about 1/2 teaspoon MSG (optionally), plus 1 tablespoon each:
- White Miso Paste
- Anchovy Paste
- Soy Sauce
- Worcestershire Sauce
- Roasted Garlic (about 1 bulb)
- Tomato Paste (sometimes – in things like red pasta sauces and beef stew)
Mix all this together in a small bowl, and add to your cooking process right before the deglazing step in most recipes.
Next up – setting stuff on fire…
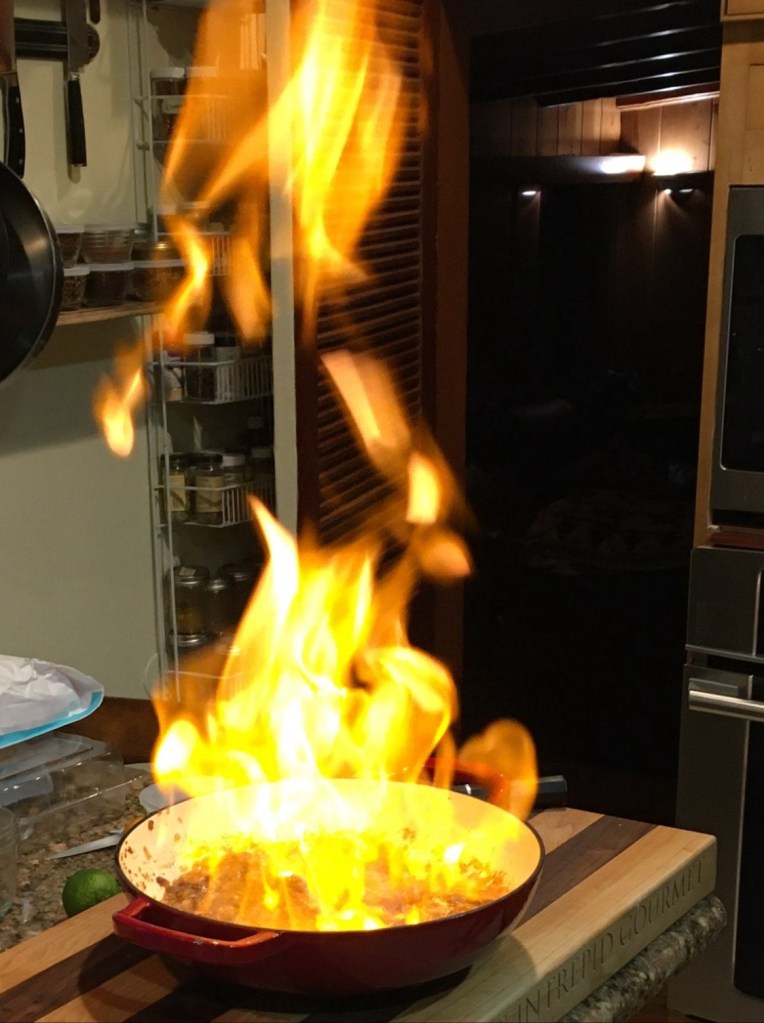
#4: You Should Flambé
Flambéing, or igniting alcohol in a hot pan, is both a primal and thrilling experience as well a spectacular thing to behold. While it isn’t really a necessary step in most recipes, it does add a depth of flavor which can’t otherwise be achieved.
Most recipes that call for a flambé will taste just fine if the alcohol is added and then cooked down for several minutes until the raw alcohol flavor is cooked off; however, flambéing when done correctly caramelizes the sugars in the alcohol creating a unique sweetness and adds the kiss of flame to whatever is in the pan.
There are a number of reasons why good restaurant food tastes different than what most people make at home – this technique is one of them and will get you one step closer to achieving professional results in your home kitchen.
Click here to read the full story and master this showstopping technique
#5: You should be tasting your food – and balancing flavors
Here’s the game-changer: If your food doesn’t taste the way you want it to, it’s probably not a matter of needing more of something; it’s probably a matter of whatever it is being out of balance.
For a lot of chefs – both professional and home cooks alike – things begin to change when they actually start to taste their food during the cooking process.
The next step is to decipher what it is you’re tasting.
When you begin this journey, your first thought upon tasting something might be to ask “What’s missing?” and then try to add more of whatever it is you think is missing (i.e., needs more garlic, needs more rosemary, needs more…).
So, you start adding things in – and pretty soon, you’ve got an ingredient list 50 items deep, and nothing tastes like anything because there’s too much stuff in there all competing for your tastebud’s attention.
Guess what? Less is more.
In other words, to quote the great Wolfgang Puck: “Keep your ingredient list short. Get the best ingredients you can afford, and try not to fuck’em up.”
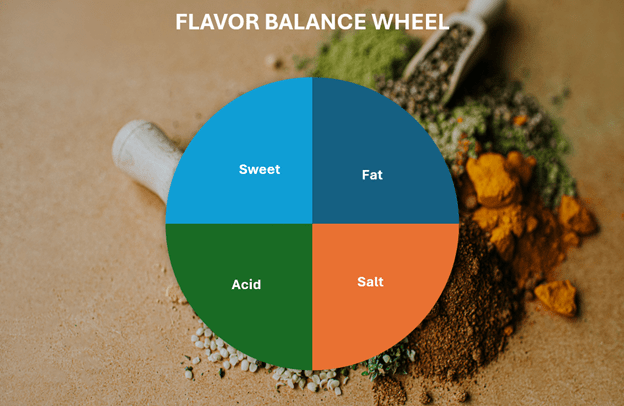
If you refer to the wheel above, you’ll see that in order to balance flavor, you need to be thinking about the following: Salt, Fat, Acid, Sweet. These elements need to be in balance with each other.
So, next time you’re making gravy, or spaghetti sauce, or soup – and you’re getting to the end of the process – try this as a finishing technique:
Take a taste of what you’ve cooked. How does it taste? A little bland? Add some salt. Taste again. Now what? A little too salty? Add a pinch of sugar. Taste again. Now what? A little dull? Add some vinegar or lemon juice (remember: vinegar is a flavor enhancer, like salt… not a flavor additive). Now what? A little sharp? Mellow it out with a splash of cream or a little knob of butter.
Additionally, remember that Salt & Sweet balance (or dampen) each other, and Acid & Fat balance (or dampen) each other. Similarly, Fat & Salt enhance each other (think potato chips), as do Sweet & Acid (think a lemonade).
Don’t be afraid to add a little bit at a time until it starts tasting the way you want – this is how we learn!
Discover more from The Intrepid Gourmet
Subscribe to get the latest posts sent to your email.

One thought on “5 Things You Should Be Doing in the Kitchen If You Aren’t Already”