This delicious Thai dish is full of fresh, bright flavors and is the perfect balance between spicy, sweet and savory. It also comes together in about 30 minutes, making it the perfect dish for a busy weeknight or some time when you don’t want takeout but aren’t wanting to spend a ton of time in the kitchen either. Enjoy!
1 TBSP anchovy paste or 2 TBSP Thai Fish Sauce (because umami!)
2 TBSP sweet Thai chili sauce
2 TBSP soy sauce
1 cup cheap saké (or chicken stock, if you don’t want to use alcohol), for deglazing
2 cans full-fat coconut milk
juice of 2-3 limes
1 TBSP brown sugar
1 cup fresh basil, leaves roughly torn
Garnish: Freshly squeezed limes and cilantro (optional)
White rice, for serving
Mise-En-Place
In a medium bowl, mix curry paste and cubed chicken and set aside
Prepare ingredients 3-7, combine, and set aside in a medium bowl (this is your base)
Prepare ingredients 8-10, combine, and set aside in a small bowl (these are your aromatics)
Prepare ingredients 11-13, combine, and set aside in a small bowl (this is your umami bomb)
Measure out saké or chicken stock
Open cans of coconut milk
Measure out brown sugar and lime juice and mix together in a small bowl
Prepare basil and set aside
Cook
Add about 2-3TBSP coconut or olive oil to a large saucepan and heat over medium-high heat until shimmering but not smoking. Add chicken with curry paste and sauté until chicken is ever so slightly browned (it doesn’t need to be cooked through) and fragrant. Remove with a slotted spoon and reserve (it’s fine to put it back in the same bowl, you’re going to finish cooking it in the sauce later anyway).
Lower heat to medium. Add your base (ingredients 3-7) and sauté until onions are translucent and peppers have become quite soft, 3-5 minutes.
Add your aromatics (ingredients 8-10), and continue to sauté until very fragrant, 1-2 minutes
Add saké or chicken stock (flambé if you like), and bring to a boil, scraping up anything stuck to the bottom of the pan. Once boiling, reduce to a simmer.
Add umami bomb (ingredients 11-13) and stir well to incorporate
Stir in coconut milk and brown sugar/lime-juice-mixture, and continue to stir until sauce is well incorporated. Bring sauce to a boil and allow to reduce by approximately 1/3
Add chicken (and any juices) back to the sauce and stir in. Allow to simmer, 8-10 minutes, until chicken is cooked through.
In the last 2 minutes of cooking, stir in the fresh basil and cook for 1 minute. Off the heat, cover, and allow to sit for 5 minutes to give flavors a chance to marry.
Serve over white rice and garnish with a few squeezes of fresh lime juice and fresh cilantro.
Mise-En-Place, French for “putting in place” is an organizational technique used by professional chefs to make sure their cooking process goes smoothly.
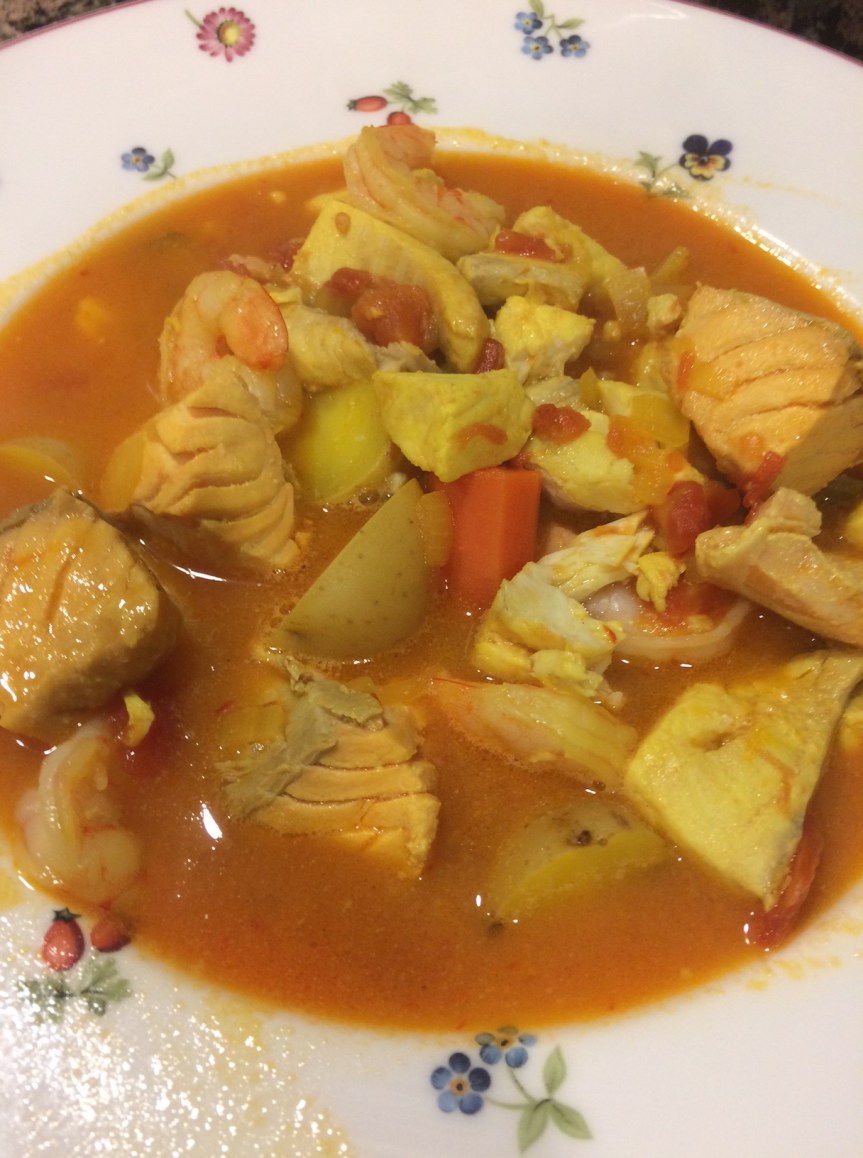
This delicious seafood stew hails from the French port city of Marseilles and represents the best of Provençal cooking: A mirepoix of onions, carrots and celery is sautéed in butter and oil, savory aromatics are added to the base along with white wine, stock and saffron and then a variety of fresh fish is gently poached to perfection. This is not a cheap dish per se, but given all that goes into it it’s not horrendously expensive either. The total ingredients should cost less than $40 and the dish easily serves 4-6.
6-8 large(ish) carrots, peeled and chopped into 1 – 1.5 inch pieces
Approximately 1lb yellow or red potatoes, cut into 1 inch cubes
2 oz canned anchovie filets, drained
4 cloves garlic, finely minced
3-4 Roma tomatoes, diced and seeds removed if necessary (some tomatoes are juicer than others)
1 14oz can chicken or seafood stock (I use chicken stock, this dish is seafoody enough for me already, but do what you want)
1 package unflavored powdered gelatin (optional, to be added to stock)
1.5 cups dry white wine (about half a bottle, cheap is fine as long as you would drink it)
Juice of 2 lemons
3 orange peel strips, 3-4 inches long, orange parts only (use vegetable peeler)
3 bay leaves
Several sprigs fresh thyme
.02oz, about 1/2 a gram, saffron threads (Trader Joe’s sells just this amount for $5.99)
1/2 teaspoon cayenne pepper
1/2 teaspoon powdered oregano (optional)
2lbs firm fresh fish of at least two types (salmon, red snapper, talapia, cod and tuna are all good choices), cut into chunks
1lb uncooked shrimp, peeled and deveined.
Prep and Mis-En-Place
Dice onion, celery and carrots and combine in a medium sized bowl (this is your mirepoix)
Slice potatoes into cubes that are approximately 1 inch in diameter
Dice (and de-seed, if necessary) Roma tomatoes and place in a medium bowl
Mince garlic, and then, using a mortar and pestle or bowl and spoon, smush (that’s the technical term) garlic and anchovie filets together to form a paste
Locate white wine and and chicken stock
Pro Tip: I also add one package of unflavored powdered gelatin to my stock at this time; it makes for a richer, thicker sauce – I’ll explain why in another post
Pro Tip: Since you’re going to dump the stock and wine into the pan at the same time, when it comes time to cook, dump the stock first and then use the empty can to measure out the wine. For now, just make sure you’ve got the wine withing arm’s reach.
Locate lemons and halve
Tie orange peel strips, bay leaves and fresh thyme together using cooking twine to make a sachet
Pro Tip: If you don’t have fresh thyme, use dried and tie the items up in a coffee filter or piece of cheese cloth. You want the flavor of these items in your stew, but you don’t want them in your stew.
Locate saffron, cayenne and oregano
Prep fish: Chunk firm fish into cubes and pieces; peel and devein shrimp
Cook
In a large sauté pan, melt butter in olive oil over medium heat. Add celery, onion and carrots and sauté, stirring occasionally, until carrots are relatively soft and just barely beginning to brown around the edges, 10 minutes.
Add garlic and anchovie paste and stir to combine. Sauté until fragrant, 1-2 minutes.
Add tomatoes and continue to cook gently. Reduce heat if things are beginning to brown too much. Cook, stirring occasionally, until all ingredients are incorporated, approximately 5 more minutes.
Add stock, wine and lemon juice and stir. Add sachet (the orange peel/bay leave/thyme thing), oregano (if using) and saffron to the pan and stir to incorporate. Add potatoes. Increase heat and bring to a boil, then lower heat to a simmer. Continue to cook until potatoes are soft, 20 – 30 minutes and liquid has reduce by 1/3 – 1/2.
Once potatoes are soft, reduce heat to a bare simmer, add fish to the pan and cover. Allow fish to cook for 5 minutes, then add the shrimp and cover again, cooking for five minutes more or until shrimp are no longer translucent. Off the heat and allow to rest, covered, 5 minutes more.
The thing that makes this dish is the garlic cream sauce. A fusion between Mediterranean and French flavor profiles, this dish is at the same time both tangy and mellow, sweet and savory and all-around amazing.
Time – Active: 60 minutes
Time – Inactive: 2-4 hours of marination for the lamb and 45 minutes to roast garlic
Level: Easy
Cost: $8-10/plate
Serves: 4-6
Ingredients
For the Lamb:
2-3 lbs Lamb Loin Chops (figure on 3 per person; they’re about 1/4lb each)
Juice of two lemons (divided)
6-8 garlic cloves, minced
Kosher salt and pepper
1/4 cup olive oil
2 TBSP clarified butter, Canola, or vegetable oil
For the Garlic Cream Sauce:
3 heads (that’s right, heads) of garlic
3 TBSP olive oil
2 TBSP unsalted butter
1 small shallot, minced
1/4 cup brandy
1/2 cup dry white wine
1 140z can low sodium chicken broth
1/4 cup heavy cream
Salt, to taste
Juice of 1 lemon.
Instructions
Combine 1/4 cup olive oil, minced garlic, juice of three lemons, salt and pepper, and lamb loin chops in a mixing bowl and toss to coat. Cover and refrigerate. Allow to marinate for 2-4 hours.
Preheat the oven to 400°F.
Remove most of the outer paper from your 3 heads of garlic. Cut the top off the heads (opposite the root end), exposing the garlic cloves inside. Drizzle 1 TBSP olive oil over each clove. Place in an oven safe baking dish, cut side up, and cover tightly with aluminum foil. Place in oven and roast until very soft and sweet, about 45 minutes. (Begin checking after 30 minutes; use a cake tester or toothpick to test for softness). Remove from oven and allow to cool, remaining covered.
Reduce oven temperature to 275°F. Place marinated lamb loins on a wire rack set on a baking sheet, and bake until internal temperature is around 125°F, approximately 30 -45 minutes (cook with temperature not time; use an instant read thermometer to verify).
While the lamb is coming up to temp in the oven, use a butter knife to help coax the roasted garlic cloves out of the heads. They will be soft and sticky so if they come apart a bit that’s okay. Reserve the roasted cloves in a small bowl.
Once the lamb is up to temp, remove from the oven and allow to rest for a couple of minutes under loose foil. Meanwhile, in a large heavy bottomed skillet or sauté pan, heat either 2 TBSP clarified butter, vegetable or Canola oil until very hot, around 400°F. Carefully add the lamb loins to the hot pan, and sear, about 3 minutes on each side until deeply browned and you have a nice crust on your lamb and a beautiful fond in your pan.
Note: Work in batches if you have to. 4-6 loins at a time is probably a good number, but remember: each time you add a loin to the pan, you reduce the overall pan temperature somewhat. Add too many and your lamb loins will steam, not brown.
Once you’ve got your lamb seared off, remove them from the pan and allow them to rest on the wire racked baking sheet loosely tented with aluminum foil while you make the garlic cream sauce.
Pour off the fat in the pan and lower the heat. Melt 2 TBSP unsalted butter in the pan. Once butter is melted but still slightly foamy, add the minced shallot and sauté until fragrant, 1 minute, being careful not to brown. Add 1/4 cup brandy and flambé. Add white wine and chicken broth and bring to a boil, scraping up any remaining fond from the bottom of the pan. Add 1/4 cup heavy cream and reduce sauce until thickened to desired consistency, 8 – 10 minutes. Once sauce is thickened, off the heat and stir for 2-3 minutes to bring down the overall temperature.
Note: For a smoother, creamier sauce, use an immersion blender to pureé or transfer contents of the pan to a blender and blend until smooth.
Squeeze juice of one lemon into sauce and stir to incorporate. Taste for seasoning and adjust with salt and/or pepper as necessary.
Note: Lemon and cream taste great together, but they are not friends. If you add the lemon while the sauce is still too hot, the acidity in the lemon will curdle your cream sauce, and that will suck. So make sure it is cooled down somewhat before adding the lemon juice. Also, pro-tip: never add cream to a sauce with lemon already in it as that will almost always result in curdling the cream; instead, do it in the order prescribed here: Reduce cream sauce, off the heat, allow to cool, and stir in lemon juice at the end.
Serve lamb with rice pilaf, Caesar Salad, and garlic cream sauce on the side.
The kitchen table has always been a place where we nourish not only our bodies, but our souls.
Let’s be real people: Times are tough right now and it doesn’t look like it’s going to get a whole lot easier any time soon. But that doesn’t mean we’re stuck eating McDonald’s and Spaghetti-O’s. It has often been said that necessity is the mother of invention – never has this been more true than in kitchens across the globe and throughout history.
This post is going to explore how we can continue the time honored tradition of making great food for cheap in our current economic and social climate. Lean times have always led cooks to find inventive ways to create dishes that are filling, satisfying, simple and delicious. The best foods from around the world are often so-called ‘peasant dishes’ because they were cobbled together from what people had laying around.
Lest we forget, in the New World in America, as Westward expansion progressed, the culinary landscape progressed with it; from the chuckwagons of the Great American West came chili – made from both beef and chicken. Meanwhile, deep in the steamy bayous of Louisiana a whole culture emerged – Cajun – and with it unique and delicious foods such as jambalaya and gumbo. And how could we fail to mention Barbecue – tough cuts of meat cooked low and slow over smoldering coals, bathed in smoke for hours on end from the Coast of California in Santa Maria to Texas to Tennessee, Kentucky, the Carolinas and Alabama.
All this goes to show that with a little planning and a little extra work, it is still possible to eat well and live well despite the financial and economic hardships afflicting millions of Americans today – I’m one of them. I would be lying to you if I didn’t say that it’s tough out there; sometimes it’s scary and there have been times when I’ve had less than 10 bucks in my checking account with pay-day several days off. But so far, I’ve got a roof over my head and my family and I have eaten well even when funds were nearly non-existent.
People have almost always found ways to feed themselves in tough economic times and 21st century America should be no different. Even though we live in an era where income inequality is a real problem and many Americans barely make enough money to pay rent (and it’s only getting worse) we must remember that we are in good company throughout history – and that the kitchen table has always been a place where we nourish not only our bodies, but our souls.
Without further ado, here are a few tips that I humbly offer to you in hopes that, no matter what you’re going through, you will find the time to cook a few times this week thereby eating a little better and saving a little money in the process.
Number 1: Comparison Shop. Download a few apps and don’t be afraid to hit multiple grocery stores to get the best prices. Going to only one grocery store is a sure-fire way to make sure you’re spending too much on groceries. Most major grocery stores have their own apps these days where you can see what is on sale in any given week. Here in California, price changes happen on Wednesdays. There are also several apps out there that let you compare prices across several grocery stores at once – so far, I’ve found Favado to be the most helpful.
Also – all that junk mail you throw away? Look through it to see if there are coupons or advertisements for what might be on sale near you. Be on special lookout for coupons where you get a dollar discount for spending a certain amount (such as $10 off a minimum purchase of $30).
Number 2: Shop at Discount Grocery Stores. You wouldn’t believe how much money you can save by shopping at either Aldi and/or Grocery Outlet.
Number 3: Plan ahead and keep your pantry well stocked. Figure out what you are going to do for each meal this week and plan at least one or two meals to generate some leftovers. Make a list of exactly what you need and stick to it. Certain things I always try to keep on hand are: beef and chicken stock, canned diced tomatoes, tomato paste, pasta of several sorts, onions, and garlic. When you begin to run low on a certain pantry essential (say, chicken stock), write that down somewhere – I keep a list on a whiteboard in my kitchen.
Number 4:Buying in bulk can save you money. This doesn’t mean that you have to go to the nearest wholesaler such as Costco or Sam’s Club and buy a bunch of stuff you won’t use (hey, look, a twelve pack of watermelons!), but there are a lot of coupons out there where you get a certain dollar amount or percentage off a minimum purchase amount or a quantity discount for buying multiples of something you WILL use. Keep an eye out for those and utilize them.
Number 5: Remember to live a little. Indulging a little bit on a few simple pleasures can actually save you money and improve your quality of life. Treat yourself to some cheese or some nuts once in a while before dinner as well as a beer or an inexpensive glass of wine; not only is there something very pleasant about having a bit to drink and some light appetizers before dinner (or while making dinner), you won’t come to the table so ravenous that you overeat and spoil any chances of having enough leftovers to form a complete meal later on. Believe it or not, there are many perfectly serviceable table wines out there for less than $5 a bottle, especially at Trader Joe’s and Aldi. Try a few of them and figure out which ones don’t suck. You can also find some pretty decent beers at Trader Joe’s and Aldi.
All in all, remember this: The best food in the world came from places and times of scarcity. It doesn’t need to be fancy or expensive to be good. You are not alone in the world – and sometimes, all it takes to remember that fact is gathering around the kitchen table on a cold night with family or a few friends to share a light pasta dish tossed in a simple sauce, a rustic hunk of bread, a wedge of cheese, and a glass or two of rough red wine.