Frenched Rack of Lamb

This method will rival the best French Restaurants, yet is simple and easy enough for any home cook.

The hardest part is finding a Frenched rack of lamb. Ask your butcher to do it for you, or keep in mind that lamb chops and lamb loin chops, or even a boneless leg of lamb will all work just as well. This technique utilizes sous vide but remember: You can get nearly the same results going low-and-slow. The simple marinade is really the key to this dish.

Continue reading “Frenched Rack of Lamb”

Killer Garlic Bread with Roasted Garlic

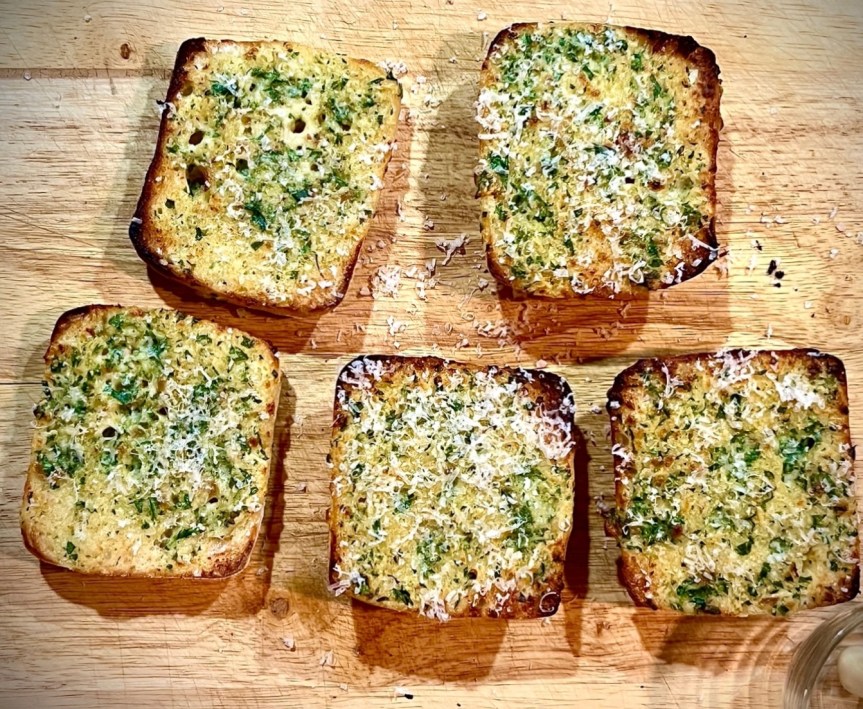
This garlic bread is so good that it’s easy to eat it in place of eating dinner by mistake; for whatever reason, it is highly addictive. 

Also, it’s guaranteed to keep the vampires away but won’t leave you feeling like a giant bulb of garlic due to the fact that its primary garlicky-ness comes from roasted, not raw, garlic.

Continue reading “Killer Garlic Bread with Roasted Garlic”

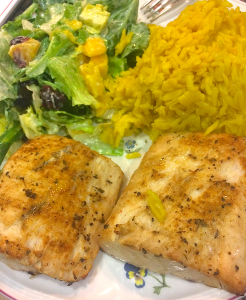
Grilled Mahi Mahi with Rice Pilaf and Summer Greens

Other than salmon, Mahi Mahi is my favorite fish to cook with.  It is firm, but not too firm, flaky, but not too flaky.  Meaty like swordfish but tender like cod.  Really, it’s the perfect fish.  Perhaps most important, it is currently not over-fished and is therefore a sustainable option.  It works well pan fried, crusted – however you want it; it work’s so well it really deserves a blog post all of its own.  But this post is on grilling – in and out in 30 minutes or less, the perfect dinner for a summer evening.  The main point of this post?  This is a hard one to screw up, so exercise those creative genes and do what makes you happy.

Ingredients

For the Pilaf

  1. 2 cups white rice
  2. 1/2 cup orzo (it’s pasta, technically, but it looks like rice – you’ll find it with pasta in the grocery store)
  3. 1-2 tablespoons butter or oil
  4. 1 small shallot, minced
  5. 2 cloves garlic, minced
  6. 1 tsp turmeric (or whatever other combination of herbs and spices make you happy).
  7. 2 teaspoons Kosher salt
  8. 5 cups liquid (water, chicken stock, whatever)

For the Summer Greens

I like a mixture of whatever mixed greens look good at the store – baby spinach, arugala, kale… whatever works.  To these I would add something on the order of 1/4 cup of dried cranberries, 1/4 cup chopped walnuts, perhaps some sliced oranges and this chili-lime and mango dressing – whatever makes you happy.

For the Mahi Mahi

  1. Mahi Mahi steaks (figure on 1-2 per person, depending on their appetites)
  2. 1 tablespoon olive oil
  3. You favorite fish seasoning (the poultry rub found in this post works surprisingly well on a lot of things, including fish.  Or you could use your favorite cajun seasoning for a blackened version.  Point is – do whatever makes you happy.  You’re getting this gist of this post now =D).

Method

For the Pilaf

  1. Heat oil and butter in whatever saucepan you’re going to use to make the rice.  Once butter is melted but still foamy, add shallots.
  2. Add garlic and sauté, 30 seconds
  3. Add orzo and, stirring constantly, toast until aroma is lightly nutty, 30 seconds to 1 minute
  4. Add liquid
  5. Add salt
  6. Add Turmeric, or whatever other herbs you’re using
  7. Add rice, cover and bring to a boil.
  8. Reduce to a simmer and simmer, covered, until all the liquid is absorbed, approximately 25 minutes

For the Summer Greens

Mix all dry ingredients together.  Dress salad right before serving.

For the Mahi Mahi

  1. Preheat grill to high heat.  Make sure the grill grates are clean.  Fish is notorious for sticking to the grill.
  2. Lightly brush mahi mahi steaks on both sides with olive oil
  3. Season steaks with seasoning of choice on both sides
  4. Lay steaks on hot grill, presentation side down, and grill for 3-5 minutes.  Using a metal spatula (use a fish spatula if you have one), turn the steaks over and grill for another 2-3 minutes, or until internal temperature reads 140°F.  Do not overcook.
  5. Remove from grill and place on platter; tent loosely with foil and allow to rest, not more than 5 minutes.

Quick Basic Breakfast Skillet

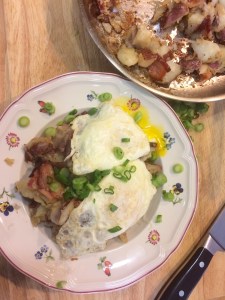
Many recipes for breakfast skillets take about an hour to complete, because they have you adding water to your skillet with the potatoes.  You have to wait a least 40 minutes for your potatoes to cook through.  In the morning, if I’m hungry and hankering for a good old fashioned breakfast skillet, I ain’t got time for that.  The secret?  Nuke the potatoes in the microwave for 6-10 minutes (depending on their size).  This also has the added benefit of being able to brown them, rather than steam them, in the skillet.

Ingredients:

  1. 4 slices thick bacon, cut into 1″ pieces
  2. 1 small onion, diced
  3. Optional:  Bell peppers, mushrooms, whatever veggies you have on hand/feel like using
  4. 1 stalk green onion, finely sliced
  5. 2 eggs
  6. 2-3 potatoes, nuked on HIGH until soft

Instructions:

  1. Begin my microwaving the potatoes.  Be sure to prick them all over with a fork so they don’t explode.  Start with 6 minutes, then check them.  If they need more time, flip them over and nuke them for another 6 minutes.
  2. While the potatoes are cooking, dice up your onions and veggies and set aside
  3. Heat a 10 or 12 inch cast iron (or stainless steel) skillet over medium-high heat and add bacon slices.  Fry bacon until nice and crispy; remove with a slotted spoon and reserve on a paper towel lined plate to drain excess grease.  Pour off all but 2-3 tablespoons(ish) bacon fat.  Remove skillet from heat.
  4. Dice up your nuked potatoes into 1″ chunks and add them to the pan.  Return skillet to medium heat and fry potatoes in bacon fat until they are golden brown all around.  Try not to move them around too much so they develop a nice crust.  Once browned, remove them from the skillet and set aside.
  5. Add the onions and other veggies to the skillet (along with a little more bacon fat, olive oil, or butter if needed) and sauté until soft and onions are translucent, 5-7 minutes.
  6. Meanwhile, while veggies are cooking, make eggs in a separate, non-stick pan.  For a breakfast skillet, I like my eggs over-easy and still runny in the middle, but do what you want.
  7. Final assembly:  In a medium bowl, add potatoes, followed by sautéed veggies, bacon and fried eggs.  Garnish with green onions and dig in.


Southern Chicken Salad

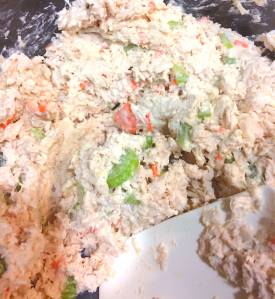
Chicken Salad is one of those things that people apparently have really strong opinions about.  That should come as no surprise, considering the number of different versions there are out there; there’s chunky chicken salad, smooth chicken salad, Napa Almond chicken salad.  Some people like to add grapes, some people like to add Indian or Eastern spices; Trader Joe’s actually stocks three entirely different versions on its shelves.  All that being said, I prefer the version here – what I call “Southern Chicken Salad” – a bit tangy, nice and smooth but still with a bit of texture, not too much mayo.  The secret here is using a food processor to chop the chicken rather than doing it by hand.

Level:  Easy
Cost: Cheap (especially if you’re using leftovers)
Serves: A Lot
Times: 15-20 minutes

Ingredients:

  1. Chicken.  Use leftover chicken, one of those store bought roasted whole chickens, or whatever kind of chicken you like.  Sous Vide chicken breasts are exceptionally nice.
  2. 2 or so stalks celery, finely chopped
  3. 1 carrot, peeled, then peeled some more, with edible shavings finely chopped
  4. Juice of 1 lemon
  5. 2 TBSP minced shallot or sweet onion (optional)
  6. Creole seasoning (Old Bay works well), to taste (optional) – adds a little zing.
  7. Mayonnaise – to taste.

Method:

  1. Add chicken to food processor, work in batches if necessary.  Hit ‘pulse’ a bunch of times to chop the chicken, scraping down the sides between pulses as necessary.  You don’t want to turn it ‘on’ nor do you want to make chicken paste here.  You just want it finely chopped.
  2. Transfer chopped chicken to a large mixing bowl.  Add ingredients 2-6 and stir well to combine.
  3. Begin adding mayo, 1-2 tablespoons at a time, until desired consistency is achieved.

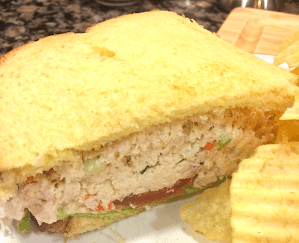
Serve with crackers, over a bed of lettuce, or in a sandwich.  Enjoy!