
Grilled Sriracha Hot Wings with Homemade Blue Cheese Dressing

Level: Easy
Cost: Cheap (especially if you’re using leftovers)
Serves: A Lot
Times: 15-20 minutes
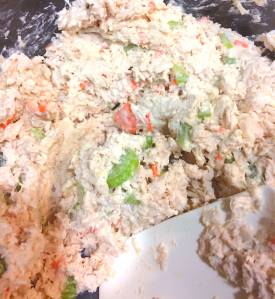
Ingredients:
Method:
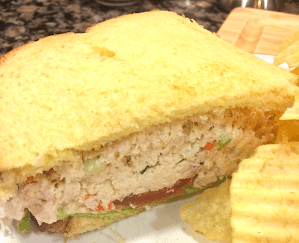
Serve with crackers, over a bed of lettuce, or in a sandwich. Enjoy!
The traditional method of roasting a chicken involves stuffing the cavity, trussing the bird, and placing it breast side up in a deep roasting pan and roasting it at 325°F for about two hours. This method is time consuming, and poses an additional problem: Uneven cooking.
You see, you want the chicken breasts to be moist and delicious, and you don’t really want pink thighs and drums. But when you place a whole chicken in a roasting pan, the breasts are exposed to the full force of the oven’s heat, while the drums and thighs are deep in the roasting pan. This means that the breasts are getting incinerated into dry stringy bits of grossness while the thighs and drums take their sweet time coming up to temp.
I’ve seen all kinds of attempts to solutions to the problem, all the way from icing down the breasts first to constantly rotating the bird in the oven (which, by the way, every time you open the oven door your oven loses 25° worth of heat and you extend the process to like 3 hours or more).
What if I told you there was a way to perfectly roast a chicken in less than an hour? Well, there is…
You may observe that the chicken in the cover picture looks a bit… flat. That’s because it is. In fact, it’s had its backbone removed and it’s been flipped over, breast-side up.
A lot of people refer to this process as butterflying or spatchcocking. It’s very simple to do.
To spatchcock your chicken, use the following procedure:
Now, you ask, why have you gone to all the trouble of doing this? Well, aside from making carving a cinch, having this nice flat chicken sitting on top of a wire rack rather than deep in a roasting pan means that the whole bird will come up to temperature at roughly the same rate. In fact, pop the chicken into a 400°F – 450°F oven for about 45 minutes and, lo and behold, the breasts will be getting finished right around the time the thighs are up to temperature. You’ve just saved yourself at least 90 minutes and your chicken will be juicy through and through.
A Word on Chicken and Temperature
If you’ve read enough of the posts on this blog you should have figured out by now that we always cook using temperature not time. Speaking of temperature, the poor chicken is probably the most overcooked item on anyone’s regular rotation. The reason for this is that chickens can house some really nasty bugs, not the least of which are salmonella and e. coli, both of which will leave you wretching up your guts for a few days – best case scenario. Because we’re aware of this, we generally follow the USDA guidelines and roast our chicken until the internal temperature of the breast is 165°F and the thighs are 180°F – meaning that they are dry and sad and horrible, like this guy:

It does also, however, mean that even a total idiot can cook a chicken or a turkey and not poison anyone. And that’s the audience that the USDA is shooting for: the general public, the total idiots, the lowest common denominator. And that’s fine, because as a government organization, that’s their job – to protect the general public from themselves.
However, that is not my job. My job is to help you get the juiciest, most delicious, succulent bird on the table that you can. If you’re reading this blog, I’m assuming that you’re not a total idiot (if you are, and you’re still reading this blog, God help you).
So here’s the thing: It’s not like salmonella (or anything bacteria, virus, amoeba, what have you) are alive at one temperature and then suddenly dead at the next. The process of pasteurization, that is, the process of ensuring that food born pathogens are eliminated from food, is a matter of both time and temperature. So the FDA (also a government organization whose job is to keep us safe from ourselves, but in this case it applies to restaurants and food vendors and producers, not individuals) has this to say about pasteurization and poultry:
FDA Pasteurization Time for Poultry
|
Temperature (°F) |
Chicken |
Turkey |
| 136 | 63.3 Minutes | 64.0 Minutes |
| 140 | 25.2 Minutes | 28.1 Minutes |
| 145 | 8.4 Minutes | 10.5 Minutes |
| 150 | 2.7 Minutes | 3.8 Minutes |
| 155 | 44.2 Seconds | 1.2 Minutes |
| 160 | 13.7 Seconds | 25.6 Seconds |
| 165 | Instant | <10 Seconds |
What you will notice here is that the USDA recommends going all the way to 165°F because at that temperature, it’s a pretty much guaranteed fail-safe. It’s also guaranteed nasty, dried out bird. Bottom line here? According to the FDA, a chicken that’s been held at 145°F for 8.4 minutes is every bit as safe to eat as a bird roasted to within an inch of incineration to 165°F.
Of course, 145°F for a chicken is a little on the rare side; it’ll still be a bit pink and gelatinous and people will know it isn’t cooked – at least to what they’re used to. My recommendation is to insert a probe thermometer into the thickest, coldest part of your chicken when you put it into the oven, wait for it to hit 150°F, set a timer for 5 minutes, then pull it out of the oven. That way, you’re well within FDA recommendations and just in case your probe thermometer is off by a degree or two or you didn’t get it all the way into the thickest, coldest part of your bird, you’ll still be fine. I’ve been doing it this way for years and I’ve never poisoned anyone. Do verify, using an Instant Read Thermometer, that BOTH the breast AND the joint between the leg and thigh BOTH read at least 150°F.
Okay. With all that out of the way, here’s the recipe:
Ingredients:
For the Chicken:
Special Equipment
Instructions
Just look at the finished product:

BUT WAIT! THERE’S MORE!
If you’d like to make a pan sauce, do the following while your chicken is in the oven:
Ingredients (This is more of a method than anything else, use what you like or what you have on hand):
Instructions:
Time: 90 minutes (30 minutes inactive)
Level: Easy/Intermediate
Cost: About $4/plate (depending on which pantry essentials you have on hand)
Serves: 3-6
Ingredients
For the Chicken:
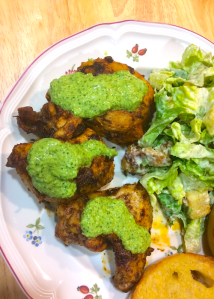
For the Green Sauce:
Prep
For the Chicken:
For the Green Sauce:
Combine all ingredients in a food processor or blender and blend until smooth. Pour into appropriately sized container and refrigerate.
Cook:
Note: I served this with some garlic toast and a bacon-avocado Caesar Salad, using the bacon bits from which I rendered the fat in Step 3 of the cooking process. It was delicious.
