Antipasto Salad

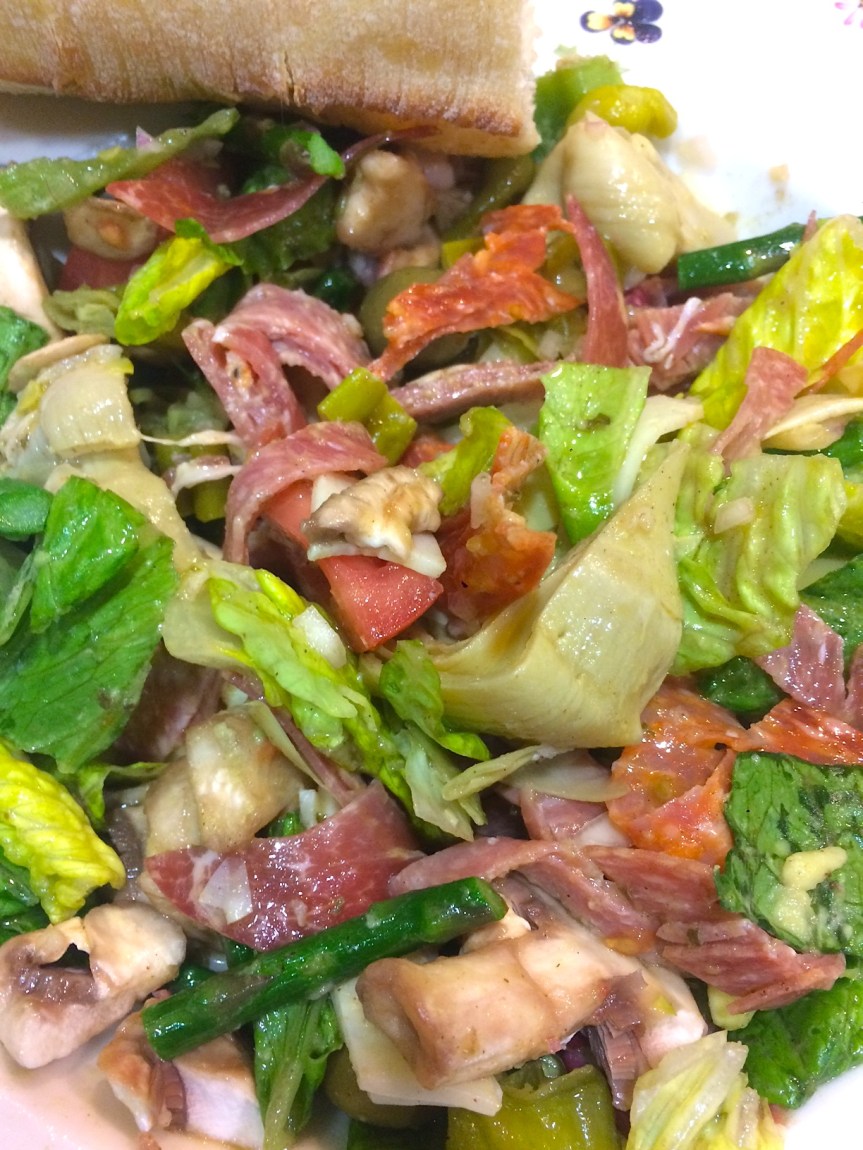
This salad is a meal in itself.  Variety is the key here:  Do what you like, but be sure to include lots of different veggies, greens and Italian deli meats.  Also, be sure to make the dressing from scratch – the dressing really livens up the salad, and since you’re having salad for dinner, you might as well go all out.  Store bought dressing in a salad like this one just won’t meet expectations.

Ingredients & Instructions

For the Dressing:

  1. 1/2 cup olive oil
  2. 1/2 cup red wine vinegar
  3. Juice of one lemon
  4. 4-5 cloves garlic, minced or run through a microplane zester
  5. 1 tablespoon dried powdered oregano
  6. 1 teaspoon salt
  7. 1/2 teaspoon white pepper
  8. 1 teaspoon sugar

Whisk all ingredients together and refrigerate for at least 30 minutes.  Dressing can be made 1 day in advance.  When left standing for a while, dressing will separate – not to worry, just re-whisk to incorporate right before serving.

For the Salad

  1. 10oz Romaine lettuce hearts
  2. Jar of marinated artichoke hearts (6-8oz), drained
  3. Jar of pepperoncini (6-8oz), drained
  4. Croutons, as desired
  5. Assortment of fresh veggies: Mushrooms, Asparagus, Broccoli, Tomatoes (steam certain veggies first and the shock in an ice-bath if necessary)
  6. 6oz assorted Italian Deli Meats:  Salami, Prosciutto, Capocollo, Calabrese
  7. Mozzarella or Provolone cheese

Combine ingredients 1-5 in a large tossing bowl.  Chiffonade Deli Meats and cheese into fine strips and add to bowl.  Toss well to combine.

Final Assembly:

Dress salad all at once or allow eaters to dress for themselves in individual serving bowls.

Southern Chicken Salad

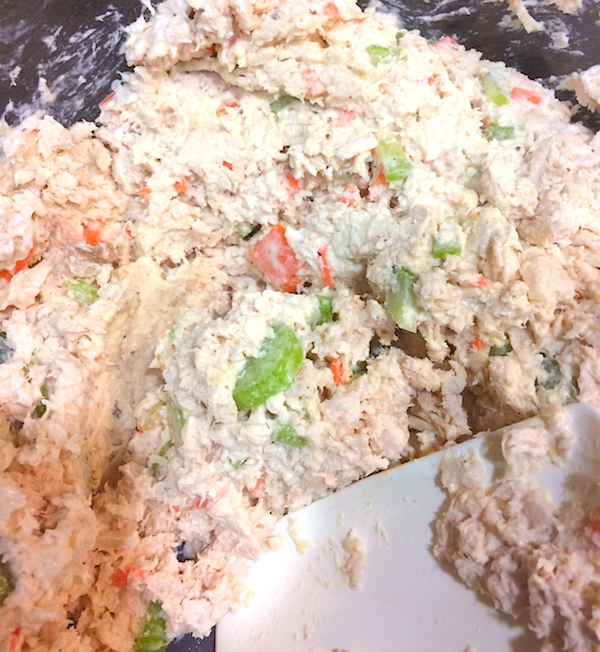
Chicken Salad is one of those things that people apparently have really strong opinions about.  That should come as no surprise, considering the number of different versions there are out there; there’s chunky chicken salad, smooth chicken salad, Napa Almond chicken salad.  Some people like to add grapes, some people like to add Indian or Eastern spices; Trader Joe’s actually stocks three entirely different versions on its shelves.  All that being said, I prefer the version here – what I call “Southern Chicken Salad” – a bit tangy, nice and smooth but still with a bit of texture, not too much mayo.  The secret here is using a food processor to chop the chicken rather than doing it by hand.

Level:  Easy
Cost: Cheap (especially if you’re using leftovers)
Serves: A Lot
Times: 15-20 minutes

Ingredients:

  1. Chicken.  Use leftover chicken, one of those store bought roasted whole chickens, or whatever kind of chicken you like.  Sous Vide chicken breasts are exceptionally nice.
  2. 2 or so stalks celery, finely chopped
  3. 1 carrot, peeled, then peeled some more, with edible shavings finely chopped
  4. Juice of 1 lemon
  5. 2 TBSP minced shallot or sweet onion (optional)
  6. Creole seasoning (Old Bay works well), to taste (optional) – adds a little zing.
  7. Mayonnaise – to taste.

Method:

  1. Add chicken to food processor, work in batches if necessary.  Hit ‘pulse’ a bunch of times to chop the chicken, scraping down the sides between pulses as necessary.  You don’t want to turn it ‘on’ nor do you want to make chicken paste here.  You just want it finely chopped.
  2. Transfer chopped chicken to a large mixing bowl.  Add ingredients 2-6 and stir well to combine.
  3. Begin adding mayo, 1-2 tablespoons at a time, until desired consistency is achieved.

Serve with crackers, over a bed of lettuce, or in a sandwich.  Enjoy!

How to Cook with Stainless Steel

Stainless steel:  The cookware that strikes fear into the hearts of even the most experienced cooks, largely because it’s known as the cookware that everything sticks to.  This post is about why that happens, how to avoid it, and why you should actually cook with stainless steel most of the time.

Continue reading “How to Cook with Stainless Steel”

All About Pasta: Part I – The Best Pasta to Cook With

Sometimes I just have to admit it:  My wife is right.

My wife Claudia is right about a lot of things more often than I would like to admit.

One of the areas where I think I am usually right, and she thinks I am usually wrong, is our disagreement regarding her religious devotion to certain big-name brands being better than others, or being superior to the ‘generic’ brands.  Honestly, in a side-by-side comparison of, say, King Arthur flour vs Gold Medal flour vs Safeway flour – I’ve never noticed much of a difference (but I’m not a baker like Claudia, I’m a cook); my experience has been that people are just willing to pay (unnecessarily) more for name brands.

For years, I insisted this was true about pasta also.  But I was wrong and she was right.  How pasta is manufactured is critical to a successful pasta dish, and, as it turns out, different pasta companies make their pasta in different ways – and that really does make all the difference.

When it comes down to pasta, there are basically three choices available:

Homemade Pasta.  Arguably, fresh, homemade pasta is the way to go.  It only requires a minute or two in boiling water and it is the silkiest, stickiest, sauciest thing that your sauce – or your pallet – will ever stick to.  It’s also an all day project that makes a huge mess, takes a lot of time, and requires a minimum of $100 worth of special equipment that takes up a lot of counter space and likely will never be used for anything else.  Ain’t nobody got time (or money) for that.  Not unless you’re running your own high-end Italian restaurant.

Pre-made Fresh Pasta.  This pasta is 99% as good as the homemade pasta.  Unless your a pasta sommelier you’re probably not going to notice the difference.  It’s available in the refrigerated section of well stocked grocery stores as well as at many specialty food stores.  It’s generally going to run you around $10.00/lb – approximately the same price as filet mignon, when it’s on sale.  A great choice, but not particularly economical.  Also, it requires refrigeration and has a quick expiration, so it can’t be kept on hand as a pantry staple.  Delicious, but not nearly delicious enough to justify the price or the fact that it’s not practical to keep on hand.

Dried Pasta.  For the rest of us mortals, dried pasta is the way to go.  It cooks through in 5 – 15 minutes (depending on the cut), lasts nearly forever in the pantry, and properly treated is 99% as good as the other two types of pasta listed above.  The trick, as my wife will tell you, is selecting the right brand…

So why does brand matter so much when it comes to selecting dried pasta?  The answer lies in how the pasta is produced; more specifically, the type of die used to extrude the pasta (i.e., squish it into the shape that it’s supposed to be).  I picked up this helpful tidbit of information through chatting with one of the purveyors at my local Italian specialty market.  He explained that the best pasta was extruded through dies made of bronze; that the next best pasta was extruded through dies made of stainless steel, and that the cheapest pasta was extruded through dies made of Teflon.  Further research in both various cookbooks and online confirmed this, at least in a general sense.

As it turns out, bronze dies are the slowest extruders, stainless steel is in the middle, and Teflon dies are the fastest.  It stands to reason, therefore, that pasta extruded through Teflon will be the cheapest, because the increased production rate translates directly to increased productivity, and thus passes the savings garnished by higher efficiency on to the consumer.

Sort of.

Savings, yes, if all that matters to you is dollars.  But there is a trade-off, as it turns out, and a pretty big one at that.  You see, when pasta is extruded through bronze dies, it leaves the finished surface of the pasta somewhat rough.  This does two things:  First, it keeps the pasta from sticking to itself during the cooking and draining process, requiring less attention and also being a bit more forgiving if your sauce isn’t done at the same time your pasta is or your guests are taking their sweet time coming to the table.  Second, and more importantly, it makes it easier for whatever sauce you’re using to stick to your pasta creating a more delicious and cohesive dish.

Smoother pasta, extruded through Teflon or stainless steel dies, as it turns out, requires constant stirring while cooking, and once drained will probably require a dash of olive oil to keep it from sticking to itself once it has been drained.  The problem with this is that, aside from requiring constant attention, now your pasta is all slippery with oil and your sauce won’t stick to it properly.  Ever made a beautiful pasta dish, only to have all the sauce slide off the pasta leaving you with flavorless pasta and a watery mess at the bottom of your plate?  That’s why.  Using pasta that’s been extruded through Teflon makes this tragic situation an inevitability.  Pasta extruded through stainless is noticeably better, but still not nearly as good as pasta extruded through bronze.

So which brands use which method?  Near as I can tell, De Cecco is the only pasta brand readily available in the United States that uses bronze dies for the extruding process.  If you can get your hands on imported Barilla Pasta (branded as “Academia Barilla”) they too use bronze dies, although I haven’t seen this too much in regular grocery stores.  The American Barilla (the one in the blue box that we all know and love) as well as the ALDI brand pasta use stainless steel dies.  Most generic pasta sold in major grocery stores uses Teflon.

In terms of cost, De Cecco and Academia Barilla will cost you around $3.00/lb, unless you can find it on sale (which with De Cecco is pretty easy to do).  American Barilla will cost you around $2.00/lb and pasta from ALDI will cost about $0.89/lb.  Most generic grocery stores pastas are around $1.00/lb.

Bottom line?  For 2 or 3 bucks a pound, buy De Cecco.  If you’re counting every penny and have an ALDI near you, buy ALDI pasta.  Don’t waste your money on generic pasta, unless you have to; Barilla, even though it is extruded using stainless steel,  is light years ahead of most generic pasta brands.  Also worthy of note:  Trader Joe’s, which is notoriously secretive about how and where they source their products, has no information about how their pasta is extruded (big surprise).  However, having cooked with Trader Joe’s pasta, it does all the things you want it to do – doesn’t require a lot of attention during the cooking process, doesn’t need oil to keep it from sticking together when drained, sauce clings to it well.  If I had to guess, I’d say it’s sourced from a manufacturer that uses bronze dies.  At $1.49/lb, that’s not a bad price.

In any case, even the cheapest, Teflon-extruded pasta isn’t that bad.  Pasta is like making love – When it’s good, it’s really good; when it’s bad, it’s still pretty good.  So don’t let all this information scare you off from making pasta at least once a week.

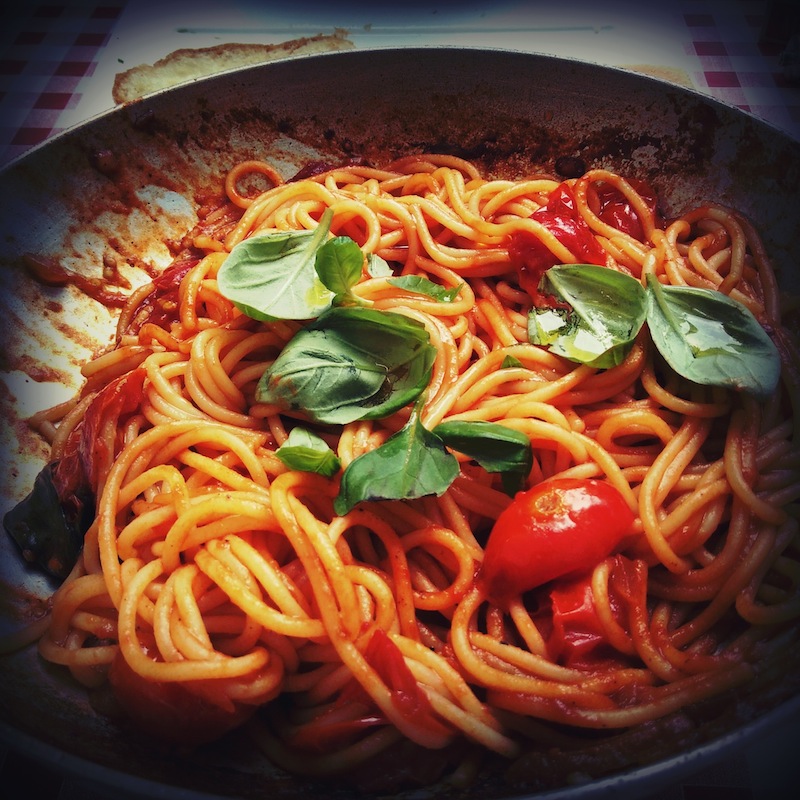
Up next?  The Four Italian Mother Sauces: Aglio E Olio, Alfredo, Marinara, and Pesto.  Pretty much all pasta dishes use one of these as a base and the possibilities are endless.  Stay tuned for Round 2 of “All About Pasta.”

 

Steaks Sous Vides – The Perfect Steak

It doesn’t get much better than this people.

If you’ve spent much time reading this blog, you know that I’m all about temperature, because temperature is the only reliable way to gauge how your food is going to turn out.

Of course temperature and heat are different things.  Heat is about how much energy you’re putting into your food whereas temperature is a way to read how much heat is in food already.

Think about it like this:  If you decide to slow-roast a piece of meat on your smoker or in your oven at a low temperature over a period of hours, you’re putting a little bit of heat into it over a long period of time.  Conversely, if you sear a steak over a hot grill or in a hot cast iron pan, you’re putting a lot of heat into it very rapidly.

The reason it’s hard to cook that perfect steak, which is medium rare bumper to bumper with a crusty, golden edge is because there’s almost no way to cook it on low enough heat for it to turn out truly perfect.  Even slowly bringing your steak up to temperature in a 200°F oven before searing it (the method I generally recommend) is going to leave striations of doneness to a small degree.  Put too much heat in and it’ll be a bullseye of doneness with only the very center cooked correctly.

Enter the Sous Vide cooker – the solution to all of your protein problems.  No more striations of doneness, no more raw centers, no more accidentally-well-done food.  Just perfect, all the time.

How does this work?  Basically, when you cook something sous vide you hold the entire piece of protein at exactly the temperature you want for an extended period of time so no matter how much time it takes, you never overcook it.

So, what exactly is sous vide?  Sous vide is the process of cooking something in a water bath which is set to an exact temperature.  Essentially, what you do is you vacuum seal you protein in a plastic bag, either using a vacuum sealer or the water displacement method (I use the latter method; it’s cheaper and has never caused me any problems) to get all the air out of the bag and drop it in a pot of water that’s being held at a constant temperature until it’s cooked through; then you simply finish it off over high heat to sear the outside and there you have it – perfectly cooked food.

This is, in fact, the way high end steakhouses typically cook their steak.  Ever wonder how a table of five can order three different cuts of steak, one rare, two medium-rare, one medium, and one medium-well and they all arrive at the table at the same time, perfectly cooked, exactly as ordered, edge to edge?  The answer is sous vide.  They’ve had those steaks sitting in different water baths at different temperatures for hours, waiting to be finished off on a hot grill and brought to your table.

That’s the secret.

You can achieve these results at home too.  There are three ways to do this:

  1. Stove top method.  Heat water in a large pot to exactly the temperature you want, verify using a thermometer, and constantly fiddle with the temperature for hours until you’ve got whatever it is you’re making cooked through.  Forget it.  Too much time, too hard.
  2. Beer Cooler method.  This works astonishingly well.  Essentially, you get your water bath to a few degrees higher than your cooking temperature and the insulated walls of the cooler should hold your water at a relatively constant temperature for a few hours; long enough to cook a steak.  J. Kenji Lopez-Alt describes the process here.
  3. Purchase a sous vide immersion circulator.  It used to be that these things were too pricey for the average home cook, but due to the popularity of the sous vide method of cooking they are becoming increasingly affordable.  Generally, they’ll run you anywhere from $75-$150.  I got mine at Aldi for $49.99.  So far so good.

No matter what method you use, you really owe it to yourself to try cooking something sous vide the next time you have a couple hours.  Here’s a short recipe for the steak featured above.

Ingredients

For the Garlic-Herb Butter:

  1. 1 stick salted (yeah, i know) butter, room temperature
  2. 3 tablespoons fresh parsley, minced
  3. 2 tablespoons fresh basil, minced
  4. 3 sprigs fresh thyme, minced
  5. 2 cloves garlic, smashed into a paste (or squished in a garlic press)

For the Steak:

  1. 2 steaks (filet, strip, or ribeye), 1.5 – 2 inches thick (the thicker the better, ask your butcher to cut you a few steaks if the ones in the case are less than 1.5 inches thick – remember, you’re searing these off at the end and it is possible to overcook your steak during that process).
  2. 2 cloves garlic, smashed
  3. Fresh herbs (such as rosemary, thyme, etc), optional
  4. Kosher salt and freshly ground black pepper

Instructions:

For the Garlic-Herb Butter:

  1. Mix all ingredients together in a small bowl until very well combined.
  2. Using plastic wrap, roll the butter into a log shape and twist the ends off (like a tootsie roll)
  3. Refrigerate until needed.

For the Steak:

  1.  Heat a water bath to 130°F for medium rare (135° for medium, anything past that forget the whole sous vide thing and just incinerate it on your stovetop; it’s easier that way).
  2. Season steaks generously with salt and pepper.  Toss each steak individually in a food-grade gallon size freezer bag along with the smashed garlic clove and herbs, if using.
  3. Using the water displacement method, seal the steaks in their bags.
  4. Introduce steaks to water bath and make sure they’re fully submerged, weighing them down if necessary.
  5. Hold steaks in the water bath at a constant temperature for at least 2 hours and not more than 4 hours.
  6. Remove steaks from bags and pat very dry with paper towels (Note:  they will look really weird – grayish brown and mushy – after coming out of the water bath; don’t worry, all is well).
  7. Sear the steaks over high heat, either in a cast-iron pan or ripping hot grill (surface temperature of heating surface should be 400°F – 500°F), 15-30 seconds per side.
  8. Remove steaks from heating surface and allow to rest; while resting, top steaks with sliced rounds of garlic herb butter and tent lightly with foil until butter is melted, 3-5 minutes
  9. Slice and serve